Discovery Vue Journal - Programming - Nairaland
Nairaland Forum / Science/Technology / Programming / Discovery Vue Journal (2423 Views)
Shocking Discovery: Bitcoin Private Keys Are The Transaction Hashes You See. / Learning Programming. (my Nairaland Journal) / Learn How To Build A Realtime Chat Application With Django, Rabbitmq And Vue.js (2) (3) (4)
| Discovery Vue Journal by Lemeechi: 2:43pm On May 08, 2019 |
1904151 Getting Started! This is all about my journey into VueJS, learning Vue and using Vue. Prior to my reading about JavaScript frameworks early in the year, starting with React, I used to see mentions of Vue without paying attention. Then on March 14, I read about React at Wikipedia, along with a smaller framework called Riot, and then saw that Evan You that created Vue used to work for Google that created AngularJS, using Angular, and he wanted Vue to have the best of the features he liked in Angular. This fed my curiosity. On this day, April 15, I began really exploring VueJS, reading the little about it at [url="https://www.w3schools.com/whatis/whatis_vue.asp"]W3Schools.com[/url] then more at their own [url="https://vuejs.org"]vuejs.org[/url] site, going through a 5-minute getting-started tutorial there although the sample application demonstrated didn't completely work when I coded it. What is VueJS? VueJS is a JavaScript framework that extends HTML with new attributes and directives, and like AngularJS is perfect for Single Page Applications (SPAs). To use VueJS: 1. Include the Vue JavaScript file (web-based or on local disk) in a <script> tag within the <header> tag of HTML document, such as:
2. Bind VueJS object to HTML elements and use double braces to represent VueJS data:
After a VueJS object is bound to an HTML, changing the VueJS variable (such as myObject.message) also changes the HTML (the <h1> value). While double braces show the value of expressions, another binding method is the v-model directive which binds input HTML elements to variables, such that when the input values change the variable values also change:
In this case any value typed into the text box appears in the paragraph above it. The v-for directive binds an array of Vue values to an "array" of HTML elements.
Installing Vue For a basic installation, the development version (https://vuejs.org/js/vue.js) includes warnings while the production version (https://vuejs.org/js/vue.min.js) does not. Once included with the <script> tag, Vue will be registered as a global object. Also Vue DevTools facilitates application debugging, https://addons.mozilla.org/en-US/firefox/addon/vue-js-devtools/ for Firefox and https://chrome.google.com/webstore/detail/vuejs-devtools/nhdogjmejiglipccpnnnanhbledajbpd for Chrome. |
| Re: Discovery Vue Journal by Lemeechi: 7:59am On May 12, 2019 |
For some unknown reasons the second post above got hidden. But you can see a much better-looking version here. |
| Re: Discovery Vue Journal by Lemeechi: 12:26am On May 16, 2019 |
1904173 The Vue Mastery introductory course, Part 1 Having finished with the getting started video at vuejs.org, I began the next exploration with the free Vue Mastery introductory course containing 11 lessons, each a downloadable video. In this first part of the post I will summarize the first seven lessons. Lesson 1 - Vue instance This showed how the Vue object was declared, with the el element pointing to the HTML container where Vue will be put to work. Discussed Vue expressions and its reactivity feature, which means when a Vue variable changes value, the new value will automatically appear wherever the variable is referenced in the HTML, and vice versa, just like with AngularJS. The following are examples of Vue expressions.
Lesson 2 - Attribute binding <img v-bind:src="image"> The HTML attribute src is here bound to the Vue expression consisting of the variable image: When the variable changes, the HTML attribute will also change. “v-bind” can be omitted, leaving just the colon, so v-bind:src is the same as :src. Examples of other HTML attributes that can be bound are alt, href, title, class, style, disabled. Lesson 3 - Conditional rendering <p v-if="inStock"> Renders the p element if variable inStock has a value of true. <p v-if="onhand>10"> Here a logical expression is used instead. <p v-else-if="onhand<=10&&onhand>0"> If the former expression is false this one is evaluated next. <p v-else> If prior expressions are false this one is taken. In all these the p element will be created in the DOM if the expression is true, deleted from the DOM if false. v-show is similar except the element is just hidden or shown rather than being deleted or created. Lesson 4 - List rendering <li v-for="detail in details">{{detail}}</li> <p v-for="variant in variants" :key="variant.variantID">{{variant.variantColor}}</p> The v-for directive renders lists. From the way it works, it appears to duplicate the HTML element where it’s specified as many times as the contents of an array. The array is represented as the second variable after in while the one before in represents the current array cell value. Lesson 5 - Handling events v-on:click="addToCart" v-on: which may be abbreviated to @ binds an expression to an event, in this case the button click event. The expression can be something like cart+=1 or a method call as in this case. For method calls, parentheses are only necessary when arguments are being passed. Examples of other events are mouseover, submit (for a form), keyup.enter (for an input box, the .enter being a modifier specifying that Enter key is required). The methods are defined using the methods attribute of the Vue instance:
Lesson 6 - Class and style binding Style binding Styles can be bound collectively using a Vue object variable, or individually. For instance in <span :style="boxStyle">...</span> the variable boxStyle would have been created as an object as in boxStyle: {backgroundColor:"red", color:"white"} Here, the color properties are either camel-cased or quoted when not, and comma is used for separation instead of semicolon. When there are more than one variables to be bound, an array is used as in :style="[boxStyle, textStyle]" Here is an example of binding the style individually: <span :style="{backgroundColor:'red'}"> The constant 'red' could also be represented by a Vue variable which would not be quoted. Vue expressions need to be quoted only when being assigned or bound to HTML attributes. Class binding Vue class binding adds a class when an expression evaluates to true. :class="{disabledButton: !inStock}" Will add the disabledButton class when !inStock evaluates to true. :class="{active: activeClass, 'text-danger': errorClass}" 'active' class will be added when activeClass value is true and 'text-danger' will be added when errorClass value is true. :class="classVar" classVar is an object variable, whose value could be {active: true, 'text-danger': false} :class="[classVar1,classVar2]" Binding to multiple class object variables at once. :class="[ isActive ? 'active': 'inactive']" Will add the 'active' class when isActive evaluates to true, or else the 'inactive' will be added. Lesson 7 - Computed properties computed is an object attribute of the Vue instance consisting of functions that compute and return values. The computed values are cached until any dependent variable changes, so are more efficient than using methods for the same purpose. Although they are functions, to use them in expressions the parentheses are optional unless when arguments are needed. For example:
By the conclusion of this lesson, the course application now looks like this.  And the Vue instance declaration looked like this:
|
| Re: Discovery Vue Journal by Lemeechi: 11:51pm On May 17, 2019 |
1904195 The Vue Mastery introductory course, Part 2 Having finished with the getting started video at [url="https://vuejs.org"]vuejs.org[/url], I began the next exploration with the free Vue Mastery introductory course containing 11 lessons, each a downloadable video. In the earlier post I summarized the first seven lessons. This is the concluding part where I summarize the last four lessons. Lesson 8 - Components The lesson transformed the product div portion of the application (and applicable sections of the Vue instance declaration) to a component so that it got replaced with <product :premium="premium"></product> in the HTML just like it’s done in React. Unlike in React, components are not created as classes. The following shows the structure of a component: Vue.component("componentID",{The componentID can be any value not containing space apart from a built-in HTML attribute. It is what will be placed inside <> to render the component. The propsDefinition is an object containing one or more variables such as {premium:{type: Boolean, required: true } } and defines the arguments to be passed to the component, in this case one named premium. The template property is the only compulsory one in the component options object. It is the one that defines the HTML string to be rendered by the component. Its one requirement is only one root-level HTML element can be returned. This means "<p>First paragraph</p><p>Second paragraph</p>" can’t be returned because there are two <p> elements, so the solution would be to put them in a container, as in "<div><p>First paragraph</p><p>Second paragraph</p></div>" and now there is only one root <div> being returned. There are different methods of creating a template such as multi-line string or single-line string, quoted with back-tick, or single- or double-quote characters as the need may be. [url="https://medium.com/js-dojo/7-ways-to-define-a-component-template-in-vuejs-c04e0c72900d"]This Medium article[/url] listed seven methods. The dataObject, methodsObject and computedObject values are just like in the Vue instance declaration. Lesson 9 - Communicating events When a component needs to let the parent know of an event within it, it needs to $emit the event like this: this.$emit("customeventname",eventparam) At the point the component is called, the event will need to be listened for like this: <Component @customeventname="handler"> Here, handler could be a method and if the event would be emitted with the optional eventparam then the method would be declared with an argument. Lesson 10 - Forms A product-review component was added to the app, within the product component, with the following form features: 1. @submit.prevent="onSubmit" The .prevent modifier stops the default behavior of page re-display when the form is submitted. The onSubmit method collects the values on the form into an object and then emits a review-submitted event with it. The event handler adds the data to an array for the product component, which is then listed out in a “Reviews” section before the reviews form. onSubmit also handles custom validation, checking to see that each field was supplied. 2. v-model="review" Each HTML input element is bound to a Vue variable with v-model so that a change in the input would reflect in the variable (review in this case) and vice versa. v-model.number ensures that the returned value is a number, and also introduces increment/decrement arrow buttons for a text input box. 3. Custom error display. The required attribute for HTML input elements was bypassed. An errors array was added to the data object of the component and is populated by the onSubmit method. At the top of the reviews form if the array is not empty its contents are displayed. Lesson 11 - Tabs A product-tabs component was added to the app, within the product component, while the product-reviews component was moved from product to it. It’s basically a menu bar inside a div with two options “Reviews” and “Make a Review” followed by two elements, one for each menu item, only one showing at a time (via v-show), the one corresponding to the currently-selected menu item. The reviews array declared for the product component now had to be passed to the product-tabs as an argument. But the addReview() method of the product component no longer worked as product no longer referenced the product-reviews directly. My first solution was to just transfer it from the product component to product-tabs and this worked, probably because arrays were passed as arguments by reference, and values in a component’s props can also be prefixed with this just like data values. However, the lesson author’s solution turned out to be different as he said a grandchild cannot emit an event for a grandparent to listen to. What he did was to 1. Remove the listening for the review-submitted event from where product-reviews was called within product-tabs. 2. Declare a new global Vue instance called eventBus with no parameters: var eventBus=new Vue() 3. Use eventBus within the onSubmit method of the product-reviews component, to emit the event, rather than using this: eventBus.$emit("review-submitted",productReview) 4. Remove the addReview method from product component. 5. Introduce the mounted() lifecycle method for the product component, which now used eventBus to listen to the review-submitted event and then do exactly what addReview() used to do: mounted(){ By the conclusion of this lesson, and the Vue Mastery introductory course, the course application now looks like this.  And the Vue instance declaration looked like this, with most of the code from the end of lesson 7 having been moved out to components: var app=new Vue({ |
| Re: Discovery Vue Journal by Lemeechi: 9:13pm On May 23, 2019 |
1904210 The Vue JS crash course by Traversy Brad Traversy is one of the popular web development authors on YouTube. My next trip on the VueJS journey was to go through his Vue JS Crash Course – 2019 video. 1. Introduction Brad starts off by introducing VueJS and its offerings. Among the tools, I took note of Vue CLI 3 and Vuex. Vue CLI 3 is a tool for generating and building VueJS apps. It incorporates Babel (“compiles” code to browser-compatible JavaScript), TypeScript, ESLint, PostCSS and others. It includes a development server with hot reload, and a tool to manage an app in a GUI. Vuex is used to manage application state across different components, similar to Redux and Flux. It serves as a central store for all components, eliminating the need for passing state details as component parameters or props. It uses actions to update the global state which then gets sent down to components. It is very ideal for large applications. As the application to be created for the course was small, Vuex would not be used. 2. Installing Vue CLI The documentation for CLI is found at its website. CLI is a Node.js module and the latest version 3 is named @vue/cli. To install it the following is typed at the command prompt: npm i -g @vue/cli After installation, there are two ways to create a new app, typing vue create appname or vue ui. In the first case, directory or folder appname will be created with template and library files and inside it, typing npm run serve will start the development server with the application on port 8080. 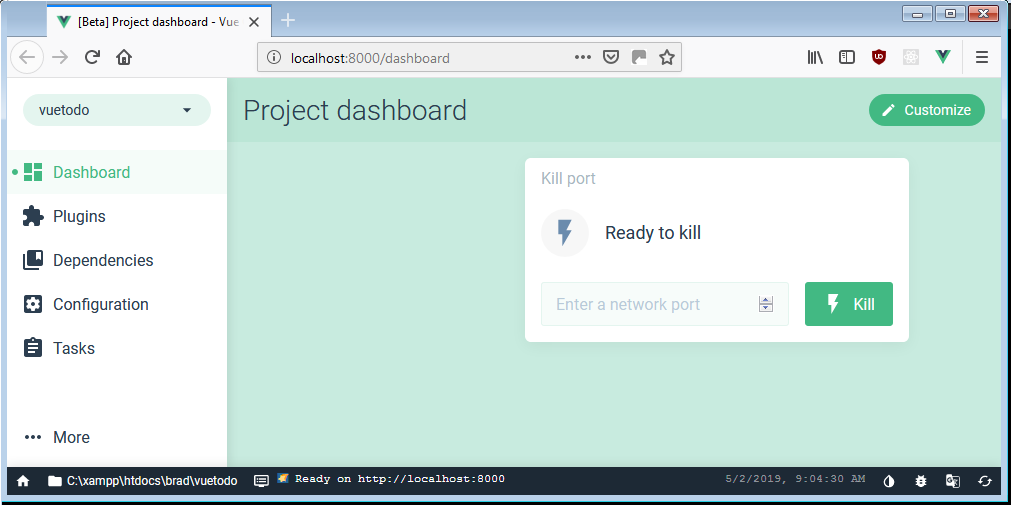 In the second case, the development server is started on port 8000 and Vue Project Manager opens against it on the browser, with options to create, list or import a project. Choose to create and then you specify the project name and some options like presets. (Saved presets will be stored in a JSON file named .vuerc in your user home directory. If there is need to modify saved presets or options, this can also be done by editing this file.) It takes a while to install CLI plugins, additional dependencies, and after almost 20 minutes (on a 1.65 GHz laptop with Windows Experience Index 3.9), it announces success and opens the Project dashboard window. (On checking the node_modules directory I saw 802 subdirectories or modules downloaded and installed, no wonder it took so long, including express module that I previously installed globally.) It’s definitely an overkill when the project is very small and just a couple of files would do, for HTML and JavaScript code. The newly-created project directory contained the following: 1. Three subdirectories: node_modules, public, src: The application files are in public (index.html and favicon.ico) and src (assets\, components\, main.js, App.vue). src\assets contains logo.png (the Vue logo) while src\components contains HelloWorld.vue. The .vue extension is for component files containing <template>, <script> and optional <style> sections. 2. Five files: README.md, package-lock.json, package.json, .gitignore, babel.config.js 3. GitHub registration and tutorial While looking for a Sublime Text syntax highlighting package for .vue files I ended up at GitHub where I saw one. I read a Medium article earlier today about working with GitHub (Getting started with Git and GitHub: the complete beginner’s guide), so I decided to register my account and then went through the introductory “Hello World” tutorial: 1. Create and use a repository named hello_world 2. Start and manage a new branch: With the master branch being the original, other branches are temporary copies for modifications. 3. Make changes to a file (README.md) and push them to GitHub as commits. 4. Open and merge a pull request: Pull requests compare changes in a branch with another, for others to comment on or for you to see. Merging makes the changes permanent, after which the branch can be deleted. I did find a .vue file syntax highlighter that is now effective in Sublime Text. Preferences > Package Control > Package Control: Install Package lists out the packages from a web repository and I could type vue to filter the results. I first selected Vue Syntax Highlight package that I saw at GitHub via Google search, but it didn’t alter the presentation of my already open .vue file. I then installed Vuejs Complete Package and it did. I also installed Babel package for JSX formatting, though I noticed that for it to be fully effective, the default JavaScript package may need to be disabled first. 4. Vue-Router This was installed midway into the course. It allows each route to render a different component. Installing it from the Vue Package Manager has one side effect, the App.vue file is overwritten so it had to be backed up first. Along with modifying App.vue to now have two sample routes (/ and /about) to display Home and About components that it creates, the installer also creates src\main.js and src\router.js files, and a views subdirectory with the Home.vue and About.vue component files. The new Home.vue was then replaced with the former App.vue contents. The location of the components directory within it, and the component’s name, were adjusted. 5. Run build The build option in the Vue Package Manager “compiles” and minifies files for production use within a dist subdirectory. The first build attempt failed with errors after 320 seconds: axios dependency not found. I had to run npm install --save axios before it succeeded. What the build process does is to convert most of the VueJS and HTML into JavaScript code with all the unnecessary spacing and line breaks taken out. 6. Course summary The course work for Traversy’s VueJS Crash Course - 2019 is the implementation of a to-do list application similar to the one for the React course I went through before. Unlike the Vue Mastery intro course this one briefly covered installing and using the CLI (that works just like React with the exception of its browser-based GUI tool, the Vue Package Manager) and also implemented HTTP calls via axios module and routing via the vue-router, along with covering the following methods and directives: $emit(), created(), v-bind, v-on (also @), v-model, v-for, scoped (styles), <template>, <router-link>, <router-view>. While several Vue.component() methods were used in the Vue Mastery course to define components in the same script file, here each component is a separate .vue file, just like in React (where they are separate .js files). Each .vue file had three sections, <template> for the HTML, <script> for the component definition and <style> for the component’s CSS, the scoped attribute allowing for a component-only style sheet. Only the first section is compulsory. A simplified props syntax was used, listing the variables in an array without any details, while in the VM course a more detailed object syntax was used. It dealt with the same issue of communicating an event from a grandchild component to a grandparent in a different manner, by having the parent also emit the same event as the grandchild did, instead of using an event bus. 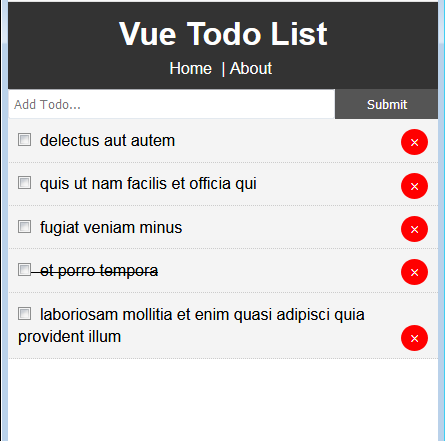 |
| Re: Discovery Vue Journal by Lemeechi: 10:33pm On Jun 02, 2019 |
1904280 Converting the Todo Vue CLI app to plain HTML/JavaScript/CSS version I next gave myself the task of converting the Vue CLI Todo List app from the Traversy course to a plain HTML/JavaScript version, to see how it would go. The CLI version had 1 .html file, 2 .js files, 7 .vue files or components distributed across different directories, as shown in the image, plus two external modules uuid and axios.  At the end of the successful exercise, the non-CLI version had just three files, for the HTML, JavaScript and CSS. The conversion process and new file structure 1. HTML The public/index.html file became the new application html file and it was expanded to reference the .js and .css files using <script> and <link> tags. Versions of the two external modules that could be referenced via the <script> tag had to be found. For axios, this was the file axios/dist/axios.min.js within its node_modules directory, while for uuid this was downloaded from h++p://wzrd.in/standalone/uuid%2Fv4@latest as listed in its documentation. 2. JavaScript My attempt to use something like import About from "About" to reference the component files atop the .js file produced the following error at the browser: SyntaxError: import declarations may only appear at top level of a module. So the <template> and relevant parts of the <script> sections of the component .vue files had to be merged together into one JavaScript file. Each component was declared as an object variable and this had to be done before it was referenced, otherwise an error like the following resulted: ReferenceError: can't access lexical declaration 'TodoItem' before initialization. Later I checked to see if I could use require() to reference the files, learning in the process that require() that I saw in the code for some Node modules was not a JavaScript function but one implemented by Node.js and later that there was a RequireJS library that also implemented it, which I looked at and downloaded but saw that using it would rather introduce extra complexity. For some reason using Vue.component() to declare the components resulted in ReferenceError: x is not defined errors. And none of these components could be placed in the .html file as custom tags as they were said to be undefined too: Because of the router implementation, the Vue instance that was created at the end of the src/main.js file was new Vue({It did not have an options variable with el property pointing to an .html root element; maybe this was the reason. After the components were declared, the routes array was declared with the root components, the router instance was instantiated and finally the Vue instance was instantiated using the router. ... 3. Stylesheet The <style> sections of the .vue files were merged together into one .css file, and fortunately there were no conflicting definitions for the same style item. Conclusion The .html file can now be opened with the browser, doing exactly the same thing as before, without a build process taking place first to create production files. The CLI method of creating apps is fine for large applications. What it produces in the build process has virtually all of the HTML replaced with dynamic element-creation JavaScript code, with all the human-aiding spacing and punctuation in the code taken out, making it much smaller. The one drawback to using scoped style sheets for components is that although each component is being styled independent of the other during development, a bigger .css file would result after the build process, as each similarly-named style item will be represented in the .css file as a separate item: If componentA has a style item named header and componentB has the same header with different definition, the build process will produce both styles named like header[componentA] and header[componentB] in the the final .css file. |
| Re: Discovery Vue Journal by dauddy97(m): 6:45pm On Jun 03, 2019 |
Bro, can you help me with your whatsapp contact. I have been wanting to learn this too. No mentor, no one to explain how the thing works. Kindly help with your contact for proper guidance. |
| Re: Discovery Vue Journal by Lemeechi: 4:16am On Jun 04, 2019 |
dauddy97:Sure. Check your email. |
| Re: Discovery Vue Journal by Lemeechi: 6:06am On Jun 04, 2019 |
Post 7 above that got hidden was titled Building the Todo course application and you can see an alternative version here. |
| Re: Discovery Vue Journal by Lemeechi: 4:50pm On Jun 05, 2019 |
1904291 Customizing the build in Vue CLI GUI  The Configuration menu of the GUI lets you change the options used when building for production. In an earlier post I wondered where the dist directory where the build files were kept was defined. This is the answer: You can see from the image that the default Public Path is / while the Output directory is dist. Make the Public Path empty string (for current directory) instead of / so all items are linked using relative paths, resulting in an application that will work from any directory it is placed. The Save changes button shows up once you make a change, and the settings are saved in the vue.config.js file in the project directory, which you can also edit manually. Changing the above two options will create a file with content similar to the following: module.exports = {Be aware that each time you Save changes only the most recent changes you made since the last save are saved and any existing vue.config.js will be overwritten. Changing Enable Production Source Maps (further down) to false means no .map files will be produced for each .js file during the build. When I did the build without .map files, the total directory size after the build dropped from about 836 KB to 150 KB. The 3 non-CLI files earlier created totaled only 9 KB excluding the four referenced files, or about 426 KB including the referenced files. |
| Re: Discovery Vue Journal by Lemeechi: 2:29pm On Jun 07, 2019 |
1905050 Enhancing the plain HTML Todo app  The next assignment I set for myself was to enhance the Todo app, working with my plain HTML/JavaScript version. This has been accomplished between April 28 and today, May 5. A compiled version of the original Todo app at the end of the Traversy course can be seen here. To this I implemented the following enhancements, which are discussed in more detail hereafter. The image above shows the end result on a mobile phone, and it can also be seen in action here. 1. Data Source dropdown with Memory, HTTP and SQLite options. 2. Disabling adding of items when HTTP website or SQLite data not available. 3. Saving the Memory list between data source changes. 4. Saving the last data source selection as a cookie, and fetching this value when the app starts. 5. Adding list of enhancements to the About page. 1. Data Source dropdown with Memory, HTTP and SQLite options The Memory option would deal with data in an array held in memory, like was done in the initial Traversy course app. HTTP would handle dummy data from the jsonplaceholder website, as later introduced in the Traversy course app. And SQLite would handle data in a real SQLite database, using a PHP script I created weeks earlier for the React course app implementation. Implementing the dropdown required some research and investigation, as I needed to address several things not covered in the course videos I’d seen: Defining the Vue instance options correctly including the router and other attributes, how to pass parameters to the route components and ensuring the Home component was re-rendered when the data source changed. 1.1. Defining the Vue instance with router and other attributes After the router was added to the Traversy course app via the Vue Package Manager GUI, the Vue instance declaration in the src/main.js file was new Vue({router, render: h => h(App) }).$mount('#app') and the declaration presented in the example code for the Vue-router documentation which I started using as a basis, was new Vue({ router }).$mount('#app') while previously, the instance definition I was used to from the earlier tutorials was something like new Vue({ el: '#app', data: {message: 'Hello World!'}}) I needed to understand why introducing the router changed the syntax. I read about the render attribute, wondering why it was used in one syntax and not in another, and then the $mount() method. It was when I saw that attaching .$mount('#app') was effectively the same as specifying el: '#app' for the options that I got rid of it. The Vue options that was specified as simply { router } in the second syntax was a shorthand for { router: router } and I could continue expanding by adding more attributes to it, so that it eventually became something like this by the time I was done: new Vue({1.2. Passing parameters to a route component The application now had two route components Home and About assigned to the router object. Specifying appname.html#/ in the URL would activate the Home component while #/about would show the other. Home is the one that deals with todo data, and what it displayed should depend on the data source selected. The Vue instance declaration earlier above would create the root component named app, making three. So first question I needed to resolve was in which of the components should the data source entry be created, followed by how should it be supplied to the Home component. Since the data source selection should be done before the data got displayed, I placed the <select> for it in the root, so declared the datasource variable in its data attribute. The documentation about passing parameters to a route component talked about passing parameters via the URL, eg specifying a route path of '/user/:id' would make id a route parameter which can be referenced as {{ $route.params.id }} but how should the parameter be passed from within the application? After some time I saw that, where the routes were declared, you can indicate props:true for the component that required parameters. Then in the component’s definition, you specify the props attribute, an array listing the names of the parameters expected. With this done, {{ $route.params.id }} could then be replaced with {{ id }}. The remaining question was which of the HTML elements for the route component should the parameter be supplied from? Was it <router-link> or <router-view>? By trial and error, I eventually found the answer to be <router-view>. 1.3. Ensuring the Home component was re-rendered when the data source changed Now my <select> was up there next to the two links for the Home and About components, and below it the todo list was displayed for the memory-based array. On selecting the HTTP or SQLite data sources though, nothing happened. My next challenge became how to force the Home component to re-render itself once the data source changed. Investigating things with the browser console, I could see that the value of app.datasource changed with the <select> value, but further down, the datasource in the props for the Home component being rendered in the <router-view> remained undefined. As I pondered and tinkered along, I read about the $forceUpdate() method and when I issued it at the console, the datasource value for the props got updated. So I started looking for the right place to position the $forceUpdate() to get the re-rendering done. Unable to do so, I went looking for an answer on the web. A blog post by Michael Thiessen found from my queries, The correct way to force Vue to re-render a component answered the question for me. He said the best way was to bind a unique key for the component. I already had the datasource variable bound to the <router-view> so next I added :key="datasource" and this did the magic! Changing the data source promptly re-rendered the component with its rightful values. 2. Disabling adding of items when data source not available Displaying existing todo list is done in the created() hook for the Home component, where axios() calls are used to retrieve data either from the jsonplaceholder website or the PHP script for SQLite. Disabling adding of items is done in the catch() method for the axios() calls, calling the disableAdd() component method. This method sets the dataFailed variable to true, displays message showing that the data source is not available, and then disables the two DOM elements in the AddTodo component, with id values of addtext and addbtn. DataFailed is passed on to the Todo component to control displaying of both the checkmark and the delete button for the item. 3. Saving the Memory list between data source changes The Home component has two arrays todos (current todo list regardless of data source value) and todosmem (memory todo list initially hard-coded with three items). When a different data source is selected, the Home component gets re-rendered. This means only the hard-coded values in todosmem will show, unless this array is saved between changes of data source. To maintain the values in the todosmem array between data source changes, it has to be declared at a higher-level component, no longer in Home. I moved it to the root instance (app) and at first passed it to Home as a props value. It got displayed like before. Then I introduced a beforeDestroy() lifecycle hook for the Home component, assigning todos to todosmem if the Memory data source was selected. This didn’t work, as Vue gave me the following warning: [Vue warn]: Avoid mutating a prop directly since the value will be overwritten whenever the parent component re-renders. Instead, use a data or computed property based on the prop's value. Prop being mutated: "todosmem" found in ---> <Anonymous> <Root> vue.js:634:9 Something like that had worked in the React version of the app, meaning Vue was more strict. <Anonymous> in the message meant the <router-view> component. So next I issued a "backup" event instead, passing the todos array as argument. In the root app component where todosmem was still declared, I introduced backupTodos() instance method, called from <router-view :datasource="datasource" @backup="backupTodos" ... /> that assigned the argument it was given to the todosmem array. This was what worked. 4. Saving and retrieving the last data source via cookie Using the v-model directive on the <select> element in the HTML file, the selected dropdown value for data source was assigned to the Vue variable datasource automatically. I introduced a watch property for the root component, for datasource and wrote the associated watch function that will be triggered when the value changed, to store the value as a cookie. Retrieving the last-saved cookie was done in the created() lifecycle hook for the root component. For a long time though the statement to save the cookie, something like document.cookie = 'datasource='+c didn’t seem to work. Trouble-shooting at the browser console, each time I changed the data source, I would type my getDatasource() function and it would reply with an empty string. I couldn’t understand it. It was a hunch that solved the riddle. I had not started the Xampp’s Apache web server service and the HTML file was opened with the file:// protocol instead of http://. Maybe it was like PHP code that also may not work without a web server. I went and started the web service, and voila! The cookie now got saved. 5. Adding list of enhancements to the About page When I expanded the template HTML for the About component by adding <ol> and <li> items, I expected to see a numbered list but none was produced when the component was rendered. I tried <ul> with the same result. Was it that Vue didn’t produce the standard list items, that it removed the list formatting? I tried assigning a style='list-style-type: square;' directly to the <ul> with no change. Later I copied out the <li> values into a data() function for the component and used v-for. Still the same, so it wasn’t an issue with the list tags. It was after I introduced list-style-position: inside; to the CSS formatting for the <ul> that I began to see a change. After tinkering with left margin, left padding and text-indent settings, I eventually realized that it was the absence of both padding and margin—set to zero for all elements at the top of the CSS file—that caused the list styles to not show up initially. With list-style-position removed I no longer had to use a negative text-indent to get the right first-line indentation. Still using the data() property, I marked up some of the text in the array to be displayed by the v-for directive. The result was that the mark-ups like <em> came out like normal text rather than being applied. So I moved the items back to the template property using <ol> and <li> elements. Once the formatting was applied after refreshing the page, I then got rid of the data() property for the component. |
| Re: Discovery Vue Journal by Lemeechi: 5:10pm On Jun 11, 2019 |
1905072 Deploying the Todo app to the web  I decided to upload both versions of the Todo List app to a web server, first the enhanced HTML version, and then the CLI version from the Traversy crash course. Deploying the enhanced plain HTML Todo app This application was built with all referenced JavaScript code loaded from the local hard disk. So prior to uploading to our web server, I did some adjustments, mostly to the HTML file: I edited the <script> tags to load the files from web CDNs:
I had to upload uuidv4latest.js and reference it in the same server directory, as when I used the “standalone” URL, nothing happened when I wanted to submit a new item in the application: On the browser console, I saw an error that uuidv4() was not defined. As for the JS file I just changed the location of the PHP script, and within the PHP script the location of the SQLite database. The CSS remained mainly as it was before. The app worked fine on the desktop using Firefox. But when I tested with Windows Phone 8.1, it didn’t work so fine in IE, UC Browser, Opera-Mini: Only the header area up to the menu bar showed and the menu items didn’t work as links. It was as if Vue wasn’t working on the Windows Phone browsers. Then I used an Android phone to check the app at the website and it worked fine on three browsers tested—Chrome, Opera, Firefox. Deploying the CLI Todo app To deploy the “compiled” version of Traversy’s CLI app to the web, I just copied the files to a directory on the server, since it was built to work from wherever it was, whether root or not. And it worked in varying degrees on Windows Phone 8.1: Opera-Mini displayed the todo items, but adding a new item wasn’t possible. Delete didn’t work but marking item completed worked. Adding was possible on UC Browser but deleted item didn’t go off the screen immediately, until I tapped the screen. Marking item completed worked. And on IE: Everything worked fine. So making sure the code is browser-compatible is one good advantage of using Vue CLI to build an application. |
| Re: Discovery Vue Journal by Lemeechi: 1:18pm On Aug 26, 2019 |
1905072 Can a global object be used instead of Vuex and props? While pondering the idea of using a separate library like Vuex to manage shared data in Vue components, I experimented to see if a global object would not serve the purpose. I found that yes, a global object could be used in Vue components but provided it will not be referenced in HTML code like Vue variables. Any global value to be referenced in HTML code would need to be first assigned to a Vue variable. To test the possibility I made new copies of the HTML and JS files for the non-CLI Todos application. Atop the JS file I put the following, creating global object g:
todosmem was formerly declared for the root app component while the other three variables were declared for the Home component. Changes to the HTML code <router-view> was changed, removing :datasource, @backup and :todosmem, leaving only :key="datasource" as now todosmem won’t be passed as a prop so can be altered in the Home component, rather than the backup event being triggered. datasource also won’t be passed as prop. Changes to the JS code 1. Changes to "app" component In the watch code for datasource, the global g.datasource was also set along with the cookie whenever the data source changed. backupTodos() method was no longer necessary. 2. Changes to "Home" component template: <Todos> changed, removing :dataFailed, :dbScriptURL and :datasource that are now global. props:['datasource','todosmem'] was removed. data(): dbScriptURL and dataFailed were removed. datasource was introduced and initialized to the global value g.datasource, now to serve as the former data source setting at the point the component was being re-rendered. The todos array was not made global because it was passed to Todos as a prop where it was used in a v-for expression, and had it been made global this would not work, without first copying it to a component array. methods: All references to this.datasource were changed to g.datasource, except the one in beforeDestroy(). this.dataFailed was changed to g.dataFailed. beforeDestroy(): Rather than emitting the backup event with the todos array as argument, the array could now be assigned to g.todosmem. created(): g.dataFailed was initialized to false to start with. this.datasource was changed to g.datasource, while this.todosmem was changed to g.todosmem. 3. Changes to "Todos" component template: <TodoItem> was changed, removing :dataFailed, :dbScriptURL and :datasource. props: Only todos was left as a prop. data(): Introduced, initializing dataFailed as false; necessary because it’s used in template expressions. created(): Also introduced to assign the global value to the local dataFailed variable. methods: All references to datasource and dbScriptURL were changed from local to global. 4. Changes to "TodoItem" component props: Only todo was left as a prop. data(), created(), methods: Same as above. A version of this post originally appeared here. |
| Re: Discovery Vue Journal by Lemeechi: 8:16pm On Sep 08, 2019 |
1905223 A first introduction to NuxtJS My first formal look at NuxtJS was to work through the Traversy video titled “Nuxt JS Crash Course.” Brad Traversy began by summarizing what NuxtJS is and its advantages, then went on to show how it’s used by building a small application that displayed jokes from a website via axios calls, including a text search form. The project name for the application was dadjokes.  What is NuxtJS? It’s a framework that offers server-side rendering for Vue applications, similar to NextJS for React. Its main advantages include * Universal apps and server-side rendering * SEO optimization * Control over HEAD, TITLE, META tags for pages * Simple page routing * Bundling with vue-router, Vuex, vue-meta and more * Presents a choice of building universal or single page app * Choice of using Express or other backend framework * Choice of using Bootstrap or other UI framework * Automatic code-splitting, Babel transpile, SASS integration * Easy build nuxt generate command that also creates a dist directory for deployment Apart from the highlighted features discussed below, most time was spent writing VueJS code in the course of the video. As I was using Sublime Text, I created a snippet for inserting skeleton code necessary for new .vue files. The course did not include building or deploying the finished project, which I later explored myself at the nuxtjs.org website. 1. Starting a project npx create-nuxt-app dadjokes was typed in a command window to create the project directory (dadjokes) and then populate it with the necessary files mostly downloaded from the web. This is one way to install NuxtJS. The project directory is created wherever you may be in the file system, so it’s necessary to first move to the right place before typing the command. At the start, the following project options were requested: Project name and description, custom server framework, selection of popular modules such as axios and express, custom UI framework such as Bootstrap, custom testing framework, rendering mode (universal or single page application), author name, package manager such as npm. The actual prompts (and responses) presented were as follows: ? Project name dadjokes ? Project description Lists bad dad jokes ? Use a custom server framework none ? Choose features to install Axios ? Use a custom UI framework none ? Use a custom test framework none ? Choose rendering mode Universal ? Author name My Self ? Choose a package manager npm At the end, the resulting project directory included 9 subdirectories (assets, components, layouts, middleware, node_modules, pages, plugins, static, store) and 6 files (nuxt.config.js, package-lock.json, .gitignore, .editorconfig, package.json, README.md). To get started with development npm run dev is typed in the project directory. This starts the (skeleton) application on port 3000 of localhost web server. If successful the following displays: 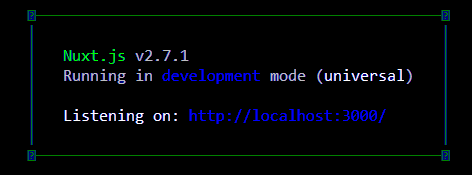 To see the application you would browse to the URL http://localhost:3000. At the end of the development work, to build and start the application for production or live use, npm run build may be used. The build process needs web access to succeed. 2. Directory management Certain directories serve certain purposes only. The directories modified in the course of building the dadjokes project were components (three new components created), layouts (its default.vue file was modified to reflect the page structure for the application, like positioning of page header and menu), and pages (its index.vue that serves as the home page was modified and another about.vue created as well as a jokes directory with its own index.vue and _id subdirectory with its own index.vue). Simple routing is implemented automatically, based on the structure of the pages directory. For instance once jokes was created under it, with its own index.vue, the URL localhost:3000/ renders the pages/index.vue component, localhost:3000/jokes renders pages/jokes/index.vue and localhost:3000/about renders the pages/about.vue without further routing specification. Because nodemon was activated automatically, compile of the code (from .vue to .js mostly) takes place automatically once any file in these directories is saved after editing. 3. Specifying links <nuxt-link to='/about'>About</nuxt-link> Relative links like this will be to files in the pages directory, in this case pages/about.vue. For our practice application, a simple menu was set up with three options Home, Jokes and About. 4. Global styling With each component being a .vue file that could have its own <style> tag, global styling for the application was done in the layouts/default.vue component. 5. Parameterized URLs To implement a URL like localhost:3000/jokes/nnn where nnn represents the ID for a given joke, a directory jokes/_id was created and given its own index.vue file. This came into play to display everything about a specific joke on its own window. 6. Page HEAD tagging for SEO Each .vue file in the pages directory that needs <head> tags such as page title is given a head() method in the <script> section, which like data() simply returns an object with different attributes such as title (page title string) and meta, an array of different META tags, like page description. A version of this post originally appeared here. *** |
| Re: Discovery Vue Journal by Lemeechi: 2:37pm On Sep 18, 2019 |
1909172 Building and deploying the NuxtJS application The Nuxt JS Crash Course did not include final building or deploying the finished project, so at the end I later did some exploration at the nuxtjs.org website on doing this. After development work, typing npm run build in the project directory creates the production version of the application. The command window messages may look something like this. 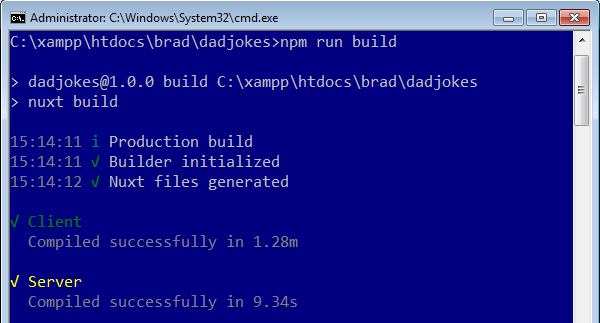 The built production files will be in the .nuxt subdirectory. To start a server running the built files, npm start is typed. When the server starts, it will show production instead of development. 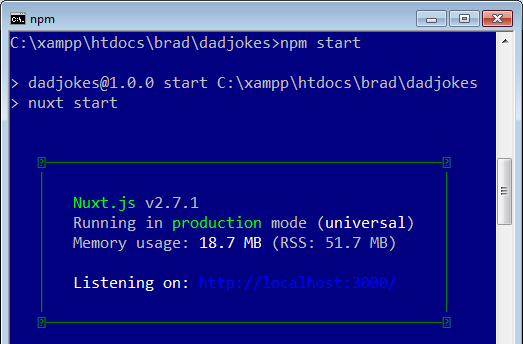 As before, browsing to http://localhost:3000 will display the production application. To deploy the application to another server, on the internet for example, npm run generate is typed to produce the necessary deployment files. (You should be online if the application referenced another website, otherwise getaddrinfo ENOTFOUND error messages will be generated.) The generated code files will be purely JavaScript and HTML so will not require NodeJS to work. The messages appearing on the command window during the files generation will look similar to the ones before, but will have a different ending, such as this. 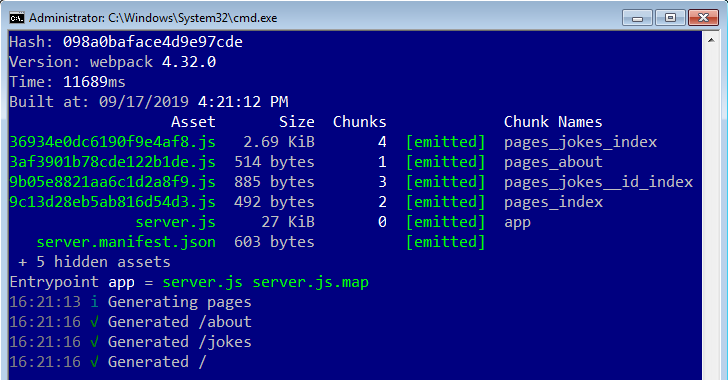 As before, each page in the application has a corresponding .js file created. But now, these deployment files will be placed in a dist subdirectory. We can then copy the contents of this to the server we want the application to be on. When I started my Apache server and browsed to http://localhost/brad/dadjokes/dist/index.html the first time, the application started, but the links for the three command buttons didn’t work as expected. They were referencing directories in the root (such as http://localhost/jokes and http://localhost/about). This will not be an issue if our application is big enough to be on its own domain or subdomain. But now I had to find out how to deploy the files to a subdirectory on the server. I did a web search on nuxt deploy subdirectory. From Stack Overflow the solution given was to supply the base property for the router element in nuxt.config.js. So I opened the file and included router: {base:'/brad/dadjokes/dist/'}, and after regenerating the files again, the application now worked perfectly. (Setting the base to empty string or './' didn’t work.) You can view the application on the web where I later deployed it here. A version of this post originally appeared here. *** 1 Like |
| Re: Discovery Vue Journal by Lemeechi: 2:21pm On Mar 12, 2020 |
2003124 Access all courses for free this weekend at Vue Mastery! I just came across this opportunity in my email. Vue Mastery, the official training site for Vue is unlocking all their courses for access this weekend only. I have enrolled myself, with the following promise: At 12:00 PM EST, March 13th your Vue Mastery account will be given access to all our premium courses, and then they'll go back to normal on March 15th at 11:59 PM EST (23:59). If you want to take advantage of this opportunity and try out some Vue training for free this weekend, go to this link now: https://www.vuemastery.com/free-weekend/ |
| Re: Discovery Vue Journal by Lemeechi: 12:59pm On Apr 08, 2020 |
2004083 Access all courses for free next week at Vue Mastery! From March 13th to 15th, Vue Mastery had its free weekend promotion for all their courses, later extended to the 16th. If you missed that and are looking for something to keep you occupied at next week, here is another opportunity. I just came across this one in my email today. Vue Mastery, the official training site for Vue will be unlocking all their courses for FREE access next week. I just enrolled myself, seeing the following promise: At 12:00 AM ET (00:00), April 13th your Vue Mastery account will be given access to all our premium courses, and then they'll go back to normal on April 19th at 11:59 PM EST (23:59). If you want to take advantage of this new opportunity, go to this link now: https://www.vuemastery.com/free-week/ |
(1) (Reply)
Nse (nigerian Stock Exchange) Api Javascript Sdk / Top 10 Websites To Learn Coding Online / Implemented Imei Generator With Python.....
(Go Up)
| Sections: politics (1) business autos (1) jobs (1) career education (1) romance computers phones travel sports fashion health religion celebs tv-movies music-radio literature webmasters programming techmarket Links: (1) (2) (3) (4) (5) (6) (7) (8) (9) (10) Nairaland - Copyright © 2005 - 2024 Oluwaseun Osewa. All rights reserved. See How To Advertise. 205 |