How To Lock A Folder With A Password In Windows 10 - Technology Market - Nairaland
Nairaland Forum / Science/Technology / Technology Market / How To Lock A Folder With A Password In Windows 10 (544 Views)
How To Lock And Unlock Your SIM Card / Top 2 Ways To Change Drive Icons In Windows 10 / How To Lock And Unlock Your Phone With Google Assistant (2) (3) (4)
| How To Lock A Folder With A Password In Windows 10 by Yinksdavid(m): 4:40pm On Sep 08, 2021 |
Keep your folders safe in Windows 10 with mindful password protection. We all have computer files we'd like to keep secret from the world, but not everyone knows how to password protect a folder in Windows 10. Whether you're hiding notes from someone with access to your computer or (hopefully) something less drastic, you're allowed to have some privacy. Fortunately, in Windows 10, you can tuck those unmentionable plans or files in a secret folder that is password protected, and you can do it without buying any additional software. Once you've created a new folder in Windows 10, here's how to password protect it. You can never be too careful when it comes to privacy. But just to be safe, you should first try this how-to using files that you can afford to lose, just in case the method doesn't work for you. Also, make sure you're keeping some record, somewhere, of the exact password you're using to lock your folder. If you lose the password, your files are gone, and since every computer is different, we can't deduce exactly what went wrong on your end. [b]Note: Do not use a password with a space, as this may create an issue with the batch file. Also full concentration is required when implementing the steps. How To Password Protect a Folder in Windows 10 1. Right-click inside the folder where the files you want to protect are located. The folder you want to hide can even be on your desktop. 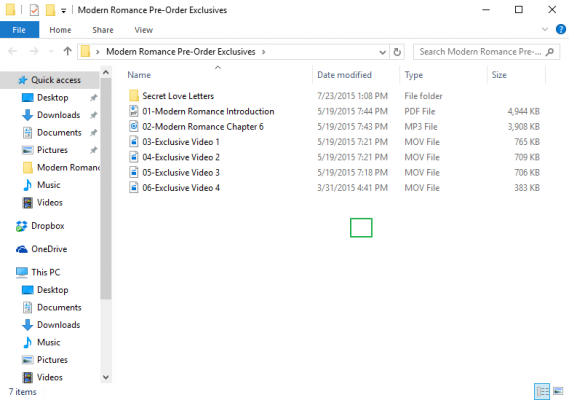 2. Select "New" from the contextual menu. 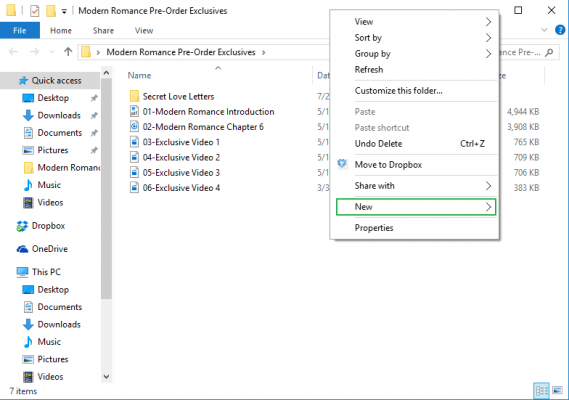 3. Click on "Text Document." 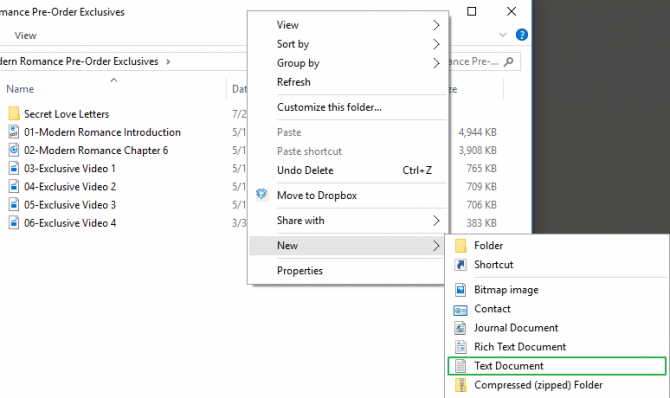 4. Hit Enter. It doesn't matter what the file will be named. You can delete this text file once the lockable folder has been made. 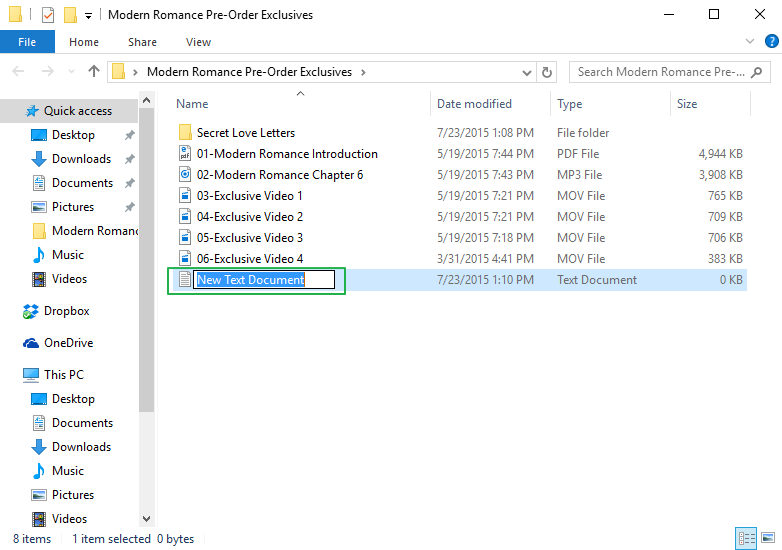 5. Double-click the text file to open it. 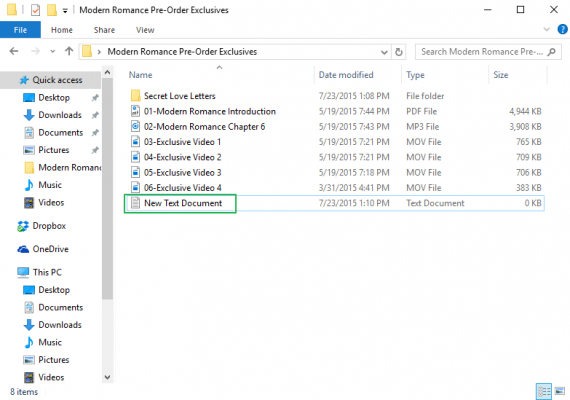 6. Paste the below text into the new document: 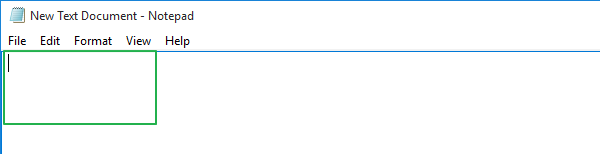 cls @ECHO OFF title Folder Locker Advertisement if EXIST "Control Panel.{21EC2020-3AEA-1069-A2DD-08002B30309D}" goto UNLOCK if NOT EXIST Locker goto MDLOCKER :CONFIRM echo Are you sure u want to Lock the folder(Y/N) set/p "cho=>" if %cho%==Y goto LOCK if %cho%==y goto LOCK if %cho%==n goto END if %cho%==N goto END echo Invalid choice. goto CONFIRM :LOCK ren Locker "Control Panel.{21EC2020-3AEA-1069-A2DD-08002B30309D}" attrib +h +s "Control Panel.{21EC2020-3AEA-1069-A2DD-08002B30309D}" echo Folder locked goto End :UNLOCK echo Enter password to Unlock folder set/p "pass=>" if NOT %pass%==Your-Password-Here goto FAIL attrib -h -s "Control Panel.{21EC2020-3AEA-1069-A2DD-08002B30309D}" ren "Control Panel.{21EC2020-3AEA-1069-A2DD-08002B30309D}" Locker echo Folder Unlocked successfully goto End :FAIL echo Invalid password goto end :MDLOCKER md Locker echo Locker created successfully goto End :End 7. Find where it says "Your-Password-Here" in the document.  8. Replace "Your-Password-Here" with the password you want to lock the folder with. 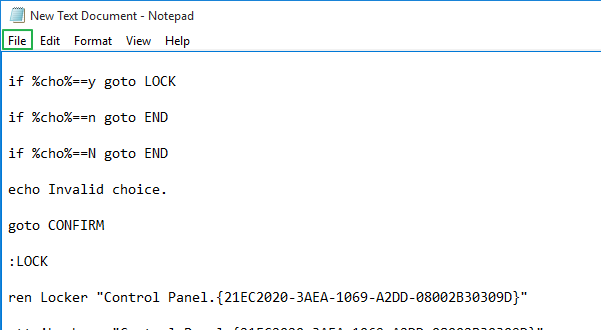 9. Click File. 10. "Select Save As..." 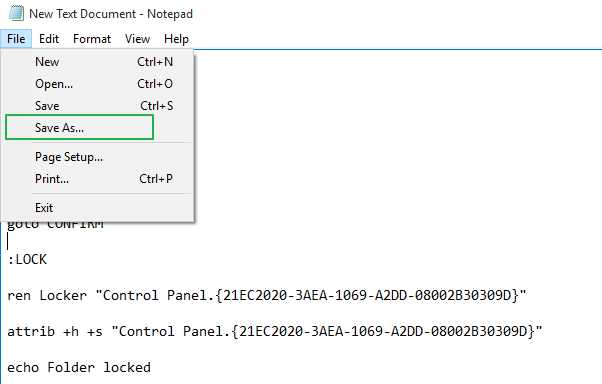 11. Click on the "Text Documents (*.txt)" menu bar that's next to "Save as type:" 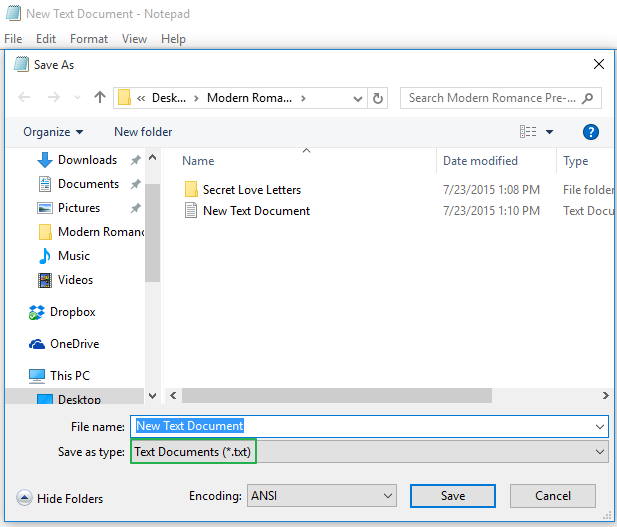 12. Select "All Files" 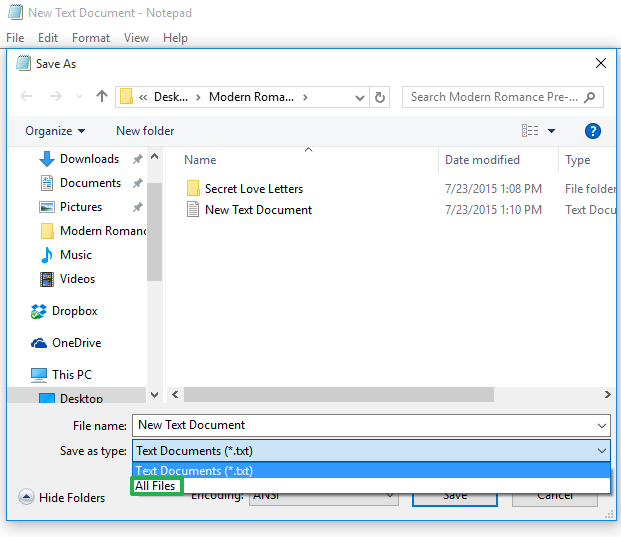 13. Change the file name to "FolderLocker.bat"  14. Click "Save."  15. Double-click FolderLocker. 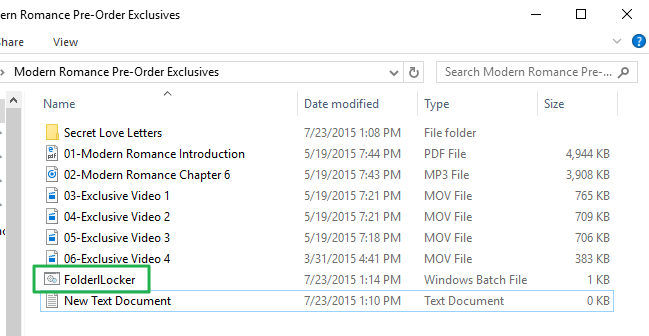 The Locker folder has been generated! 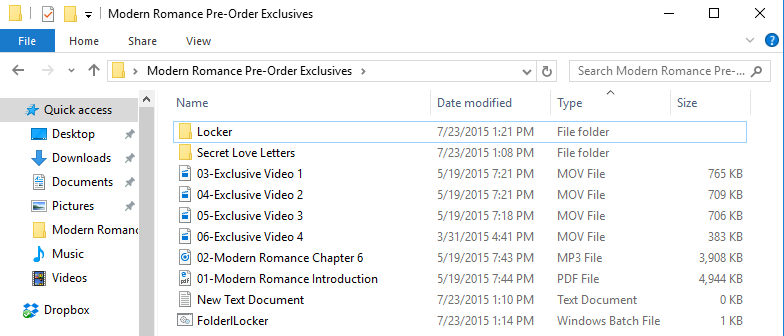 16. Fill the Locker folder with the items you want to protect.  17. Open the FolderLocker file, because it's time to lock that folder up! 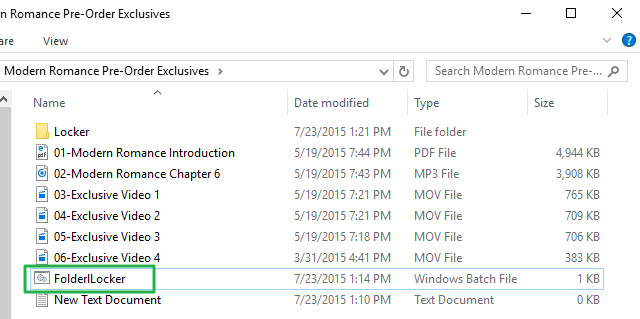 18. Type "Y" into the screen. 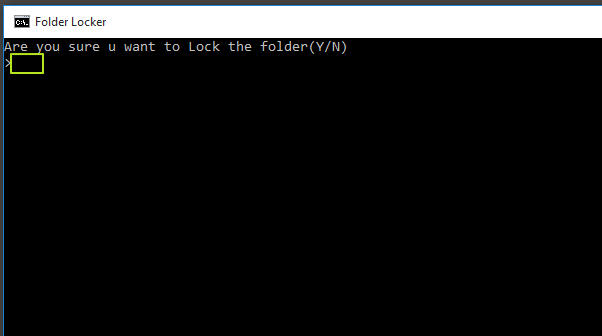 19. Click Enter, and the Folder Locker window will disappear, along with the Locker folder itself! Your secrets are safe! 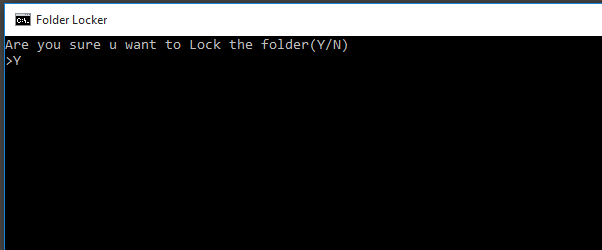 To unlock the folder, double-click "FolderLocker" to open it. 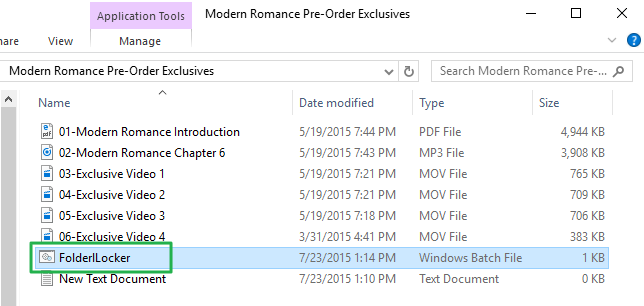 Enter the password you entered in Step 8, and click Enter.  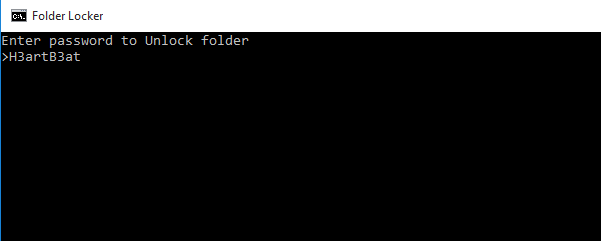 The Locker folder is back. You can open it to find your hidden files. Repeat Steps 17, 18 and 19 to lock the folder again. 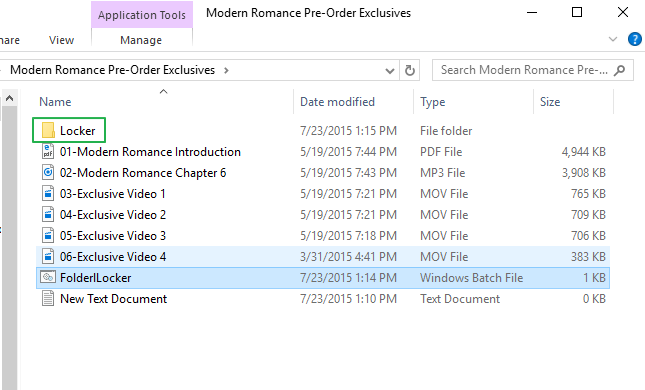 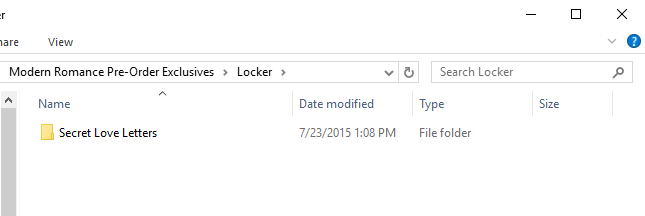 |
| Re: How To Lock A Folder With A Password In Windows 10 by StPete: 5:22pm On Sep 08, 2021 |
Well done!! Nicely taught |
| Re: How To Lock A Folder With A Password In Windows 10 by Yinksdavid(m): 5:29pm On Sep 08, 2021 |
StPete: Thank you and I appreciate your time to view the info. I will be sharing about so many things we can do on work stations to help improve productivity and security of our works so kindly stay tuned and regularly check for my updates. Goal is to pass as much info(IT) as possible. 2 Likes |
| Re: How To Lock A Folder With A Password In Windows 10 by jamiudarex(m): 6:07pm On Sep 08, 2021 |
Thanks for sharing this info, more wisdom |
| Re: How To Lock A Folder With A Password In Windows 10 by Yinksdavid(m): 6:53pm On Sep 08, 2021 |
1 Like |
| Re: How To Lock A Folder With A Password In Windows 10 by Swaylore: 7:20pm On Sep 08, 2021 |
Nice one. |
| Re: How To Lock A Folder With A Password In Windows 10 by Yinksdavid(m): 7:32pm On Sep 08, 2021 |
| Re: How To Lock A Folder With A Password In Windows 10 by Yinksdavid(m): 6:07am On Sep 09, 2021 |
Good Morning All, If you are having issues with installing or updating your Windows 10 OS, experience any issue after installation, need to know how best to utilize your Windows 10 or you are curious for knowledge purposes about Windows 10 OS, Kindly reach out to me via yinks.azure@gmail.com or the whatsapp number below on my signature and I would be glad to assist. Thanks This also applies to other Microsoft Applications such as Office, Office365, Outlook2019, Sharepoint2019, Dynamics CRM, Exchange Server, Windows Server. |
| Re: How To Lock A Folder With A Password In Windows 10 by Yinksdavid(m): 4:20pm On Sep 10, 2021 |
Here's how to format your hard drive in either OS Want to use one external drive for both your Windows PC and your Mac machine? One hurdle you'll face is that, by default, these platforms use different filesystems. Windows uses NTFS while Mac OS uses HFS, and they're incompatible with each other. However, you can format the drive to work with both Windows and Mac by using the exFAT filesystem. Below are the steps to follow In this guide, we're using exFAT instead of FAT32, another filesystem that both Windows and Mac can read and write to, because FAT32 has a maximum 4GB file size limit whereas exFAT can work with files as large as 16EB (exabytes). exFAT also performs better than FAT32. How to format an external drive in Windows The instructions below are for Windows 10, but other versions of Windows from Windows 7 and up can also format an external drive as exFAT for use with Mac as well. 1. Connect the drive to your Windows PC. 2. Open the Disk Management tool. You can do that by typing "disk format" or "disk management" in Windows search or going to Control Panel > Administrative Tools > Create and format hard disk partitions. 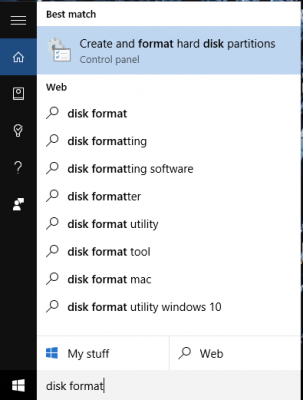 3. Right-click on the external drive's partition or unallocated space you want to format and choose New Simple Volume… 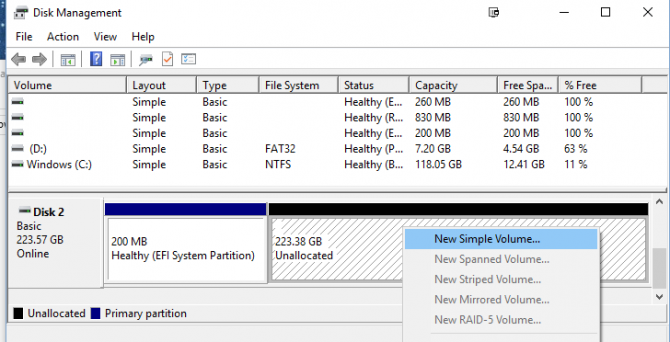 4. Follow the wizard to choose a volume size. 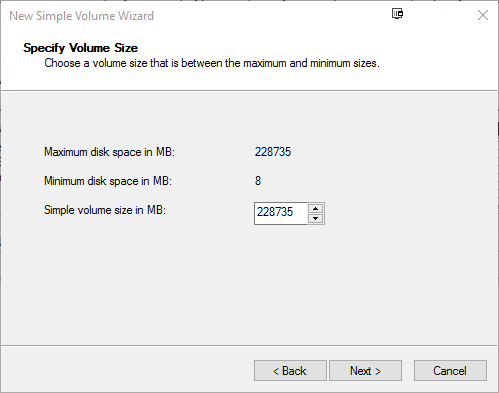 5. Assign a drive letter. 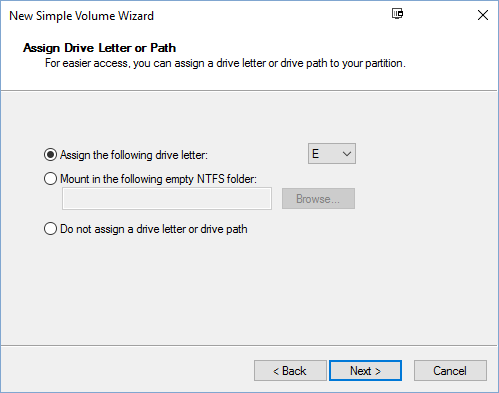 6. Choose exFAT as the file system in the Format Partition screen. 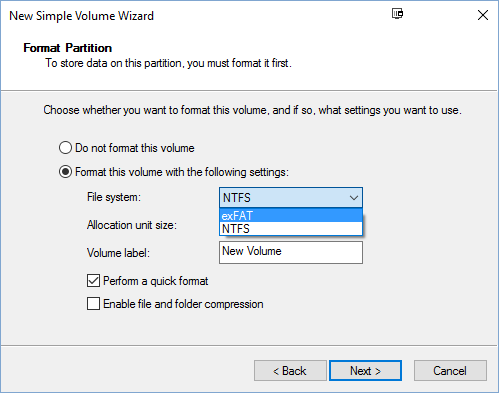 7. Give the volume a new name. 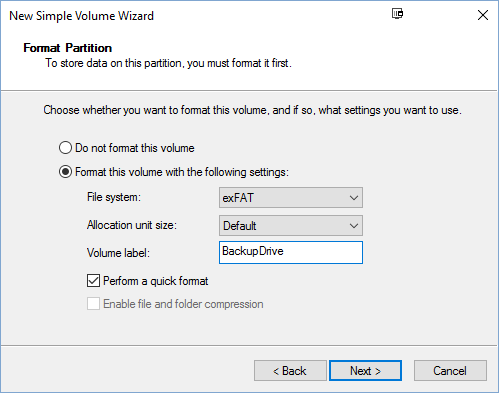 8. Click Next. 9. Click Finish. 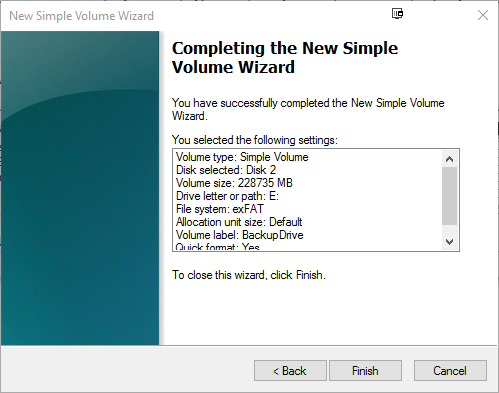 Windows will format the drive as exFAT and you'll be able to use the drive on both Windows and Mac. |
| Re: How To Lock A Folder With A Password In Windows 10 by Yinksdavid(m): 5:59pm On Sep 10, 2021 |
How to format an external drive in OS X 1. Connect the drive to the Mac. 2. Open Disk Utility. The easiest way to do that is hit CMD and the spacebar at the same time and type in "Disk Utility" to find the program. 3. Select the drive you want to format. 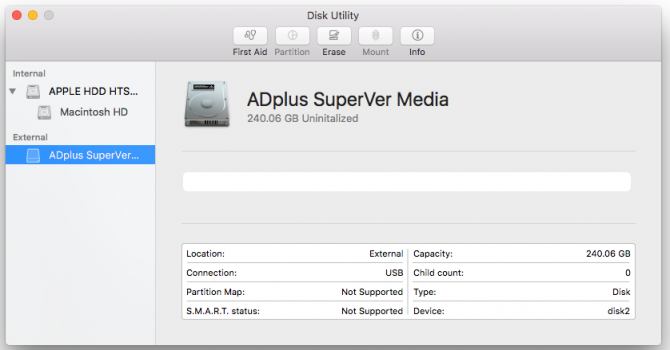 4. Click Erase. 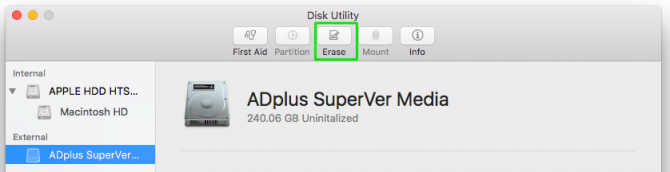 If you don't plan on using the drive for Time Machine, skip steps 5 through 11 below and continue with step 12. 5. Give the drive a descriptive name and leave the default settings: OS X Extended format and GUID partition map. These will format the drive in OS X's HFS+ filetype so it will be compatible with Time Machine. 6. Click Erase and OS X will format the drive. 7. With the drive selected in Disk Utility, click Partition.  8. Enter the amount of space you want to set aside for Time Machine. In this example, we're shrinking the Time Machine partition to 128GB instead of allowing Time Machine to take up the whole drive. 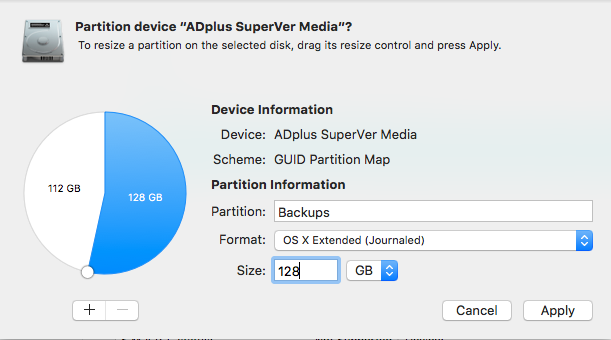 9. Click Apply. 10. Select the new untitled partition so we can format it as exFAT for use with both Mac and Windows.  11. Click Erase. 12. Give the partition a name and select exFAT for the format. 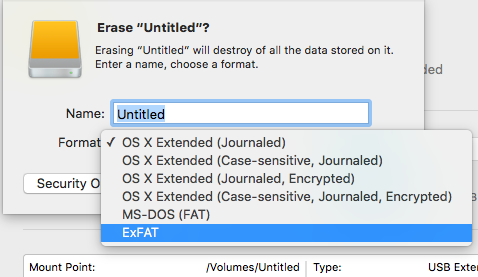 13. Click Erase to finish. Your exFAT-formatted drive or partition can now be used for both Windows and Mac. Note that using a drive frequently between Windows and Mac could increase the chances of file corruption, so make sure you have backups of the files on the shared drive and be extra careful about safely ejecting the drive before disconnecting it from your computer. |
| Re: How To Lock A Folder With A Password In Windows 10 by Yinksdavid(m): 9:06am On Sep 11, 2021 |
How to Use Maximum CPU Power in Windows 10 For power-hungry applications, Windows 10 has an option to max out your CPU. It’s not the ideal way to run your computer (it produces extra heat), but it should cover your needs for brief periods of high demand usage. 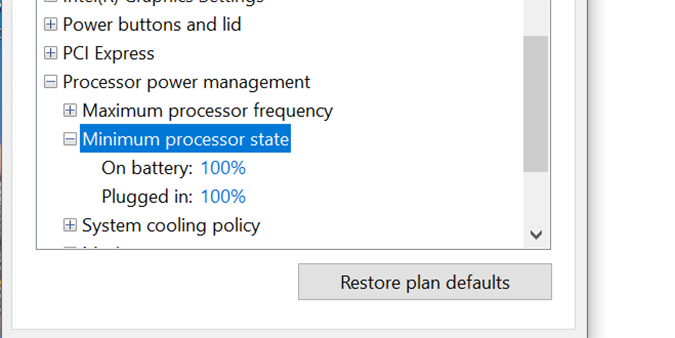 Here’s how it’s done. 1. Right click the Start menu and select Control Panel. 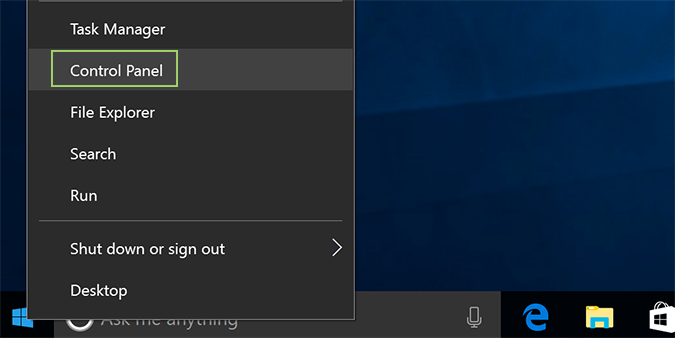 2. Click Hardware and Sound. 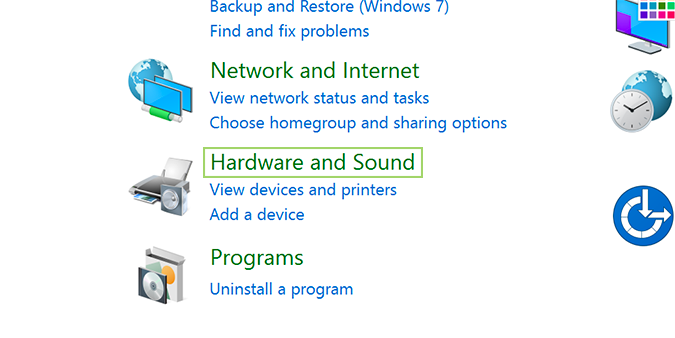 3. Select Power Options. 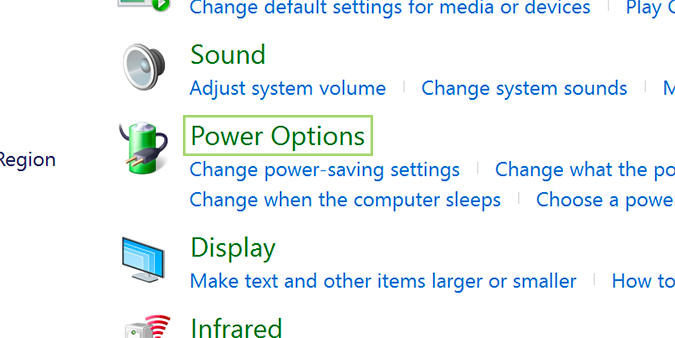 4. Find Processor power management and open the menu for Minimum processor state. 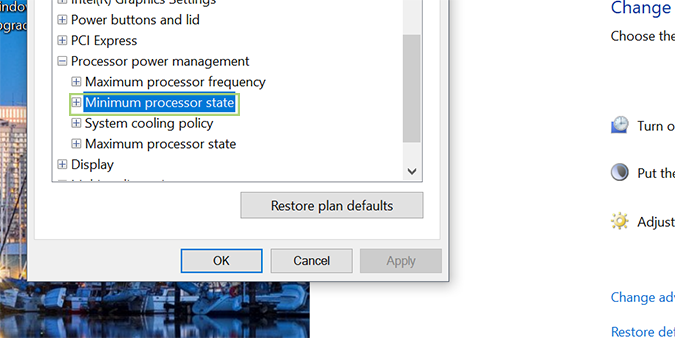 5. Change the setting for on battery to 100%. 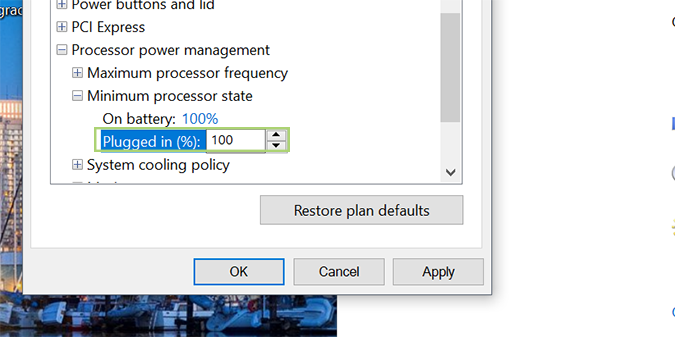 6. Change the setting for plugged in to 100%. |
| Re: How To Lock A Folder With A Password In Windows 10 by Yinksdavid(m): 6:26pm On Sep 16, 2021 |
Genuine License/Activation Keys for the following Microsoft products are available at a very low cost . kindly reach out via my signature for more details. Exchange Server 2016 (Standard and Enterprise Edition) Exchange Server 2019 (Standard and Enterprise Edition) Office 2013 (Professional, Standard and Ultimate version) Office 2016 (Professional, Standard and Ultimate version) Office 2019 (Professional, Standard and Ultimate version) Office 365 - Project Professional 2019 - Office Home and Business 2019 - Visio Professional 2019 - Office Professional Plus 2019 Office Home and Business 2016 for Mac Office Home and Business 2019 for Mac Office Professional Plus 2016 Office Professional Plus 2019 SharePoint Server 2016 (Standard and Enterprise) SharePoint Server 2019 (Standard and Enterprise) Visual Studio Enterprise 2017 Visual Studio Enterprise 2019 Visual Studio 2017 for Mac Visual Studio 2019 for Mac Windows 10 Pro Windows 10 Enterprise Windows 10 Pron N Windows 10 Education Windows Server 2016 (Datacenter, Remote Desktop Services user connection(50) and Standard) Windows Server 2019 (Datacenter, Remote Desktop Services user connection(50) and Standard). |
(1) (Reply)
Tokunbo Inverter Batteries Available For Pickup / Avita Microsoft Surface / Sold
(Go Up)
| Sections: politics (1) business autos (1) jobs (1) career education (1) romance computers phones travel sports fashion health religion celebs tv-movies music-radio literature webmasters programming techmarket Links: (1) (2) (3) (4) (5) (6) (7) (8) (9) (10) Nairaland - Copyright © 2005 - 2024 Oluwaseun Osewa. All rights reserved. See How To Advertise. 44 |